(•_•) What do we need for this tutorial to start?
- SkinEdit.
- An image editing program like Photoshop or Gimp, i guess!
- A general idea of what we want to do.
- Force of will.
(•_•) Okay, i've got them all. Now what?
Now, before starting, let's take a look at what we've got.
A player's skin is a 32x64 image that bears all the faces of the cubes and parallelepipeds that the player is made of.
SkinEdit is a java app made by Patrick Sweedman. It is meant for real-time rendering of what a skin will look like and has some nice features such as the PartPicker. You should get familiar with how what you draw on the texture will look in three dimensions by looking into the preview box in SkinEdit.This is the original texture, I wrote:
Why using Photoshop then? Well, for how cool this program may seem, it obviously lacks the level of customization that PS has. :-\ With Photoshop one can use layers and a lot of useful stuff that SkinEdit can't do, so we'll be using SkinEdit mainly for previewing what we do with Photoshop.
(•_•) Come onnn! We don't have the whole day!
Yeah yeah, all right. Here's what you have to do:
- Open in Photoshop the original skin file named "char.png" that can be found here or above.
- It might help you to trace some guides like this, to help you remember the boundaries of the cube faces.
-
- As you can see, there is a sort of shading on certain sides of the player's body. Make a new layer with the selected parts like in the picture and fill it with black.
-
We will later put this layer above all the others, and set its opacity at 10%
In this way the final skin will not look like a flat horseshit cube.
- Let's take a reference picture. I'll be using this random picture i got on /fa/.
-
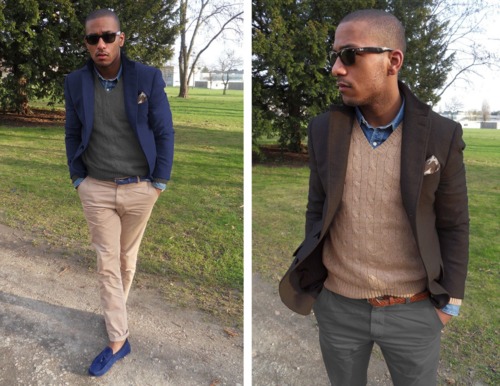 lolwut
- Start drawing the parts of your model. In this case i'll start with the shirt and torso area, so i'll make a new layer called "Shirt" or something like that. The important thing is: make a new layer per each new part.
-
Hmm… let's preview it using SkinEdit…
-
Hm. Well, good enough for now.
- Do the same for the whole body…
-
-
Meh, looks all right. But we are not finished yet.
- Now, a key to make skins not look as flat and shitty as they would be, is to add a bit of Noise to it.
So, go on each of the levels you made and apply Filter > Noise > Add noise… to them individually.
-
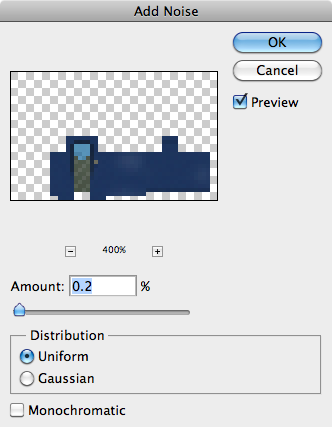
You should mess with the values and ratios until you get the result you want. Not too noisy, but not just a flat color.
-
-
“Haters gonna hate”
(in this render it does not seem all that different, but it is noticeable in-game)
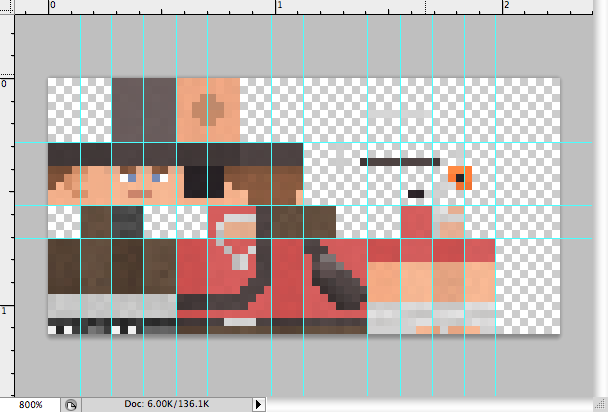
- One note about the skin texture: The space to the right of the head texture is what SkinEdit defines "Hat" space. Something drawn on it gets rendered on a sort of concentric cube outside of the head, like this example:
-
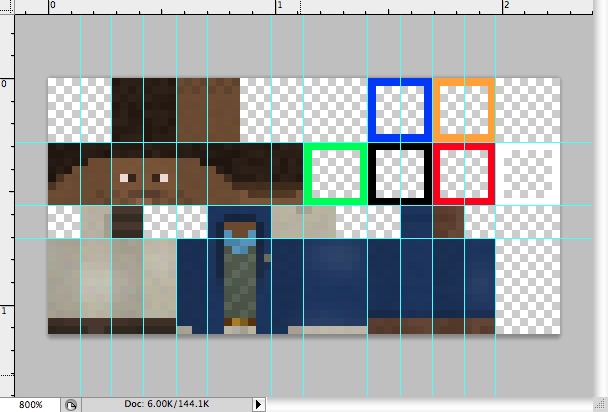
-
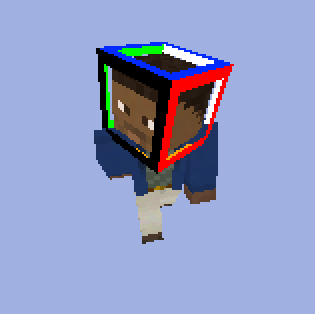
This can either be used to make hats or various accessories. in the PartPicker there are some examples of how to use that space along with the head texture itself.
Like in this example:
-
-
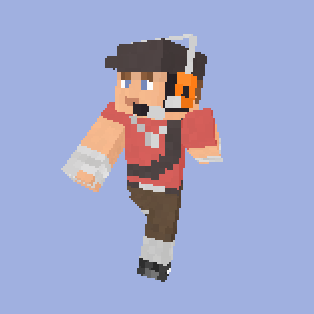
- When you are satisfied with your texture, save it in .png format and upload it to http://www.minecraft.net/profile/ after you log into your minecraft account.
And that's it! It was harder to write a tutorial about it than to do the whole process! I hope you find this useful!
Bye!
PS: it translates to "Supercalifragilisticexpialidocious".


 [/url]